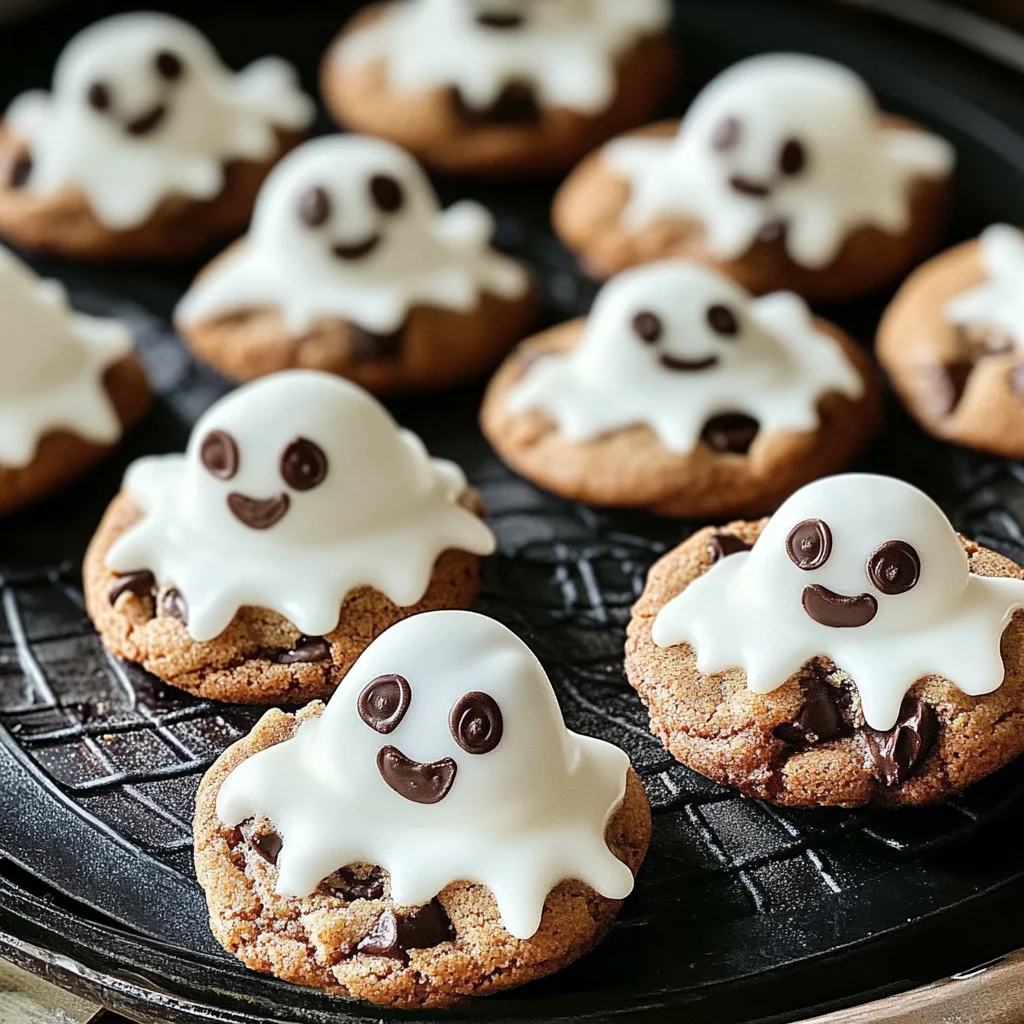
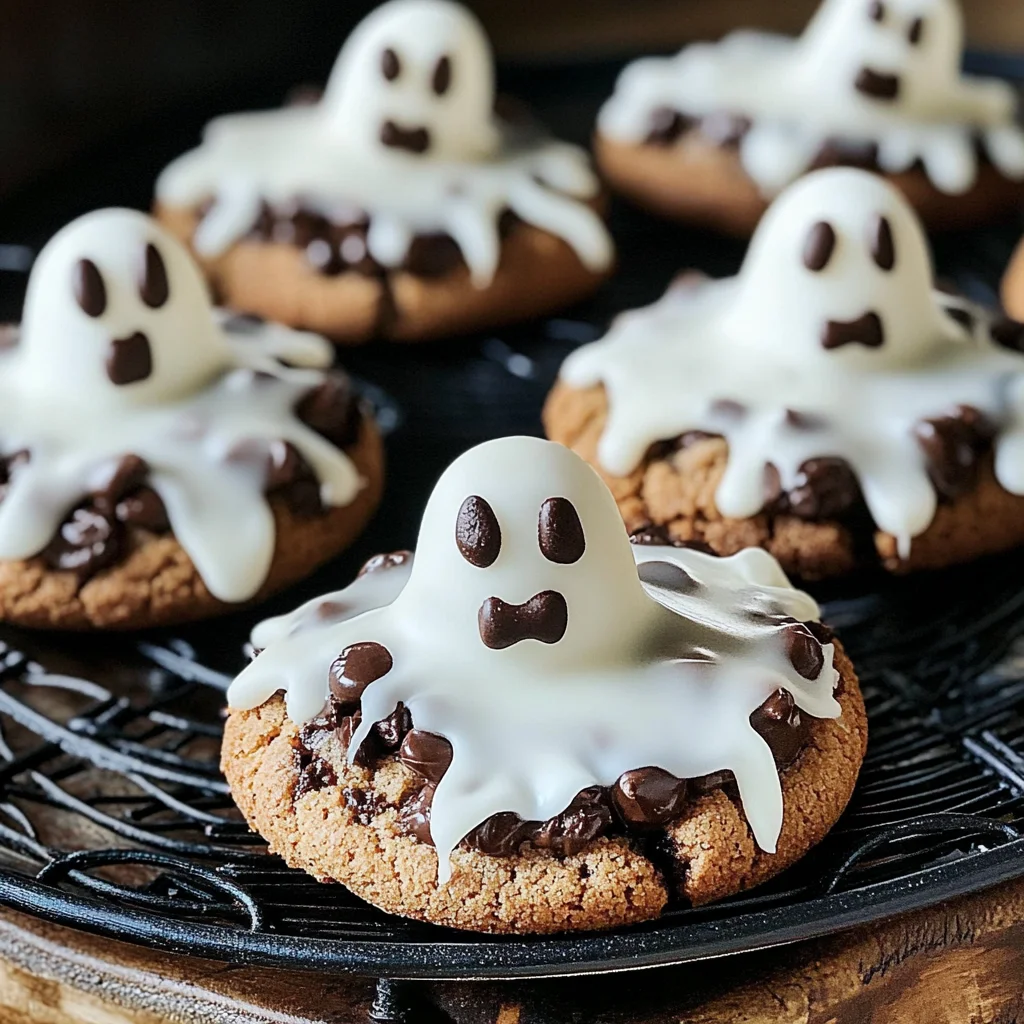
Ghost cookies
Ghost cookies are the perfect way to celebrate Halloween with a fun and spooky twist! These treats are not only easy to make but also delightful to eat. With their cute ghostly appearance, they can brighten up any Halloween gathering or party. Plus, they use simple ingredients that you likely already have at home, making them an ideal choice for last-minute treats.
Why You’ll Love This Recipe
- Quick and Easy: With just a few simple steps, you can whip up these ghost cookies in no time.
- Fun for Everyone: Kids and adults alike will enjoy decorating and munching on these festive goodies.
- Versatile Design: You can customize the ghost shapes and expressions to match your Halloween theme.
- No Baking Required: These cookies come together without turning on the oven, keeping things cool and simple.
- Perfect for Parties: Their whimsical design makes them a hit at any Halloween party or gathering.
Tools and Preparation
To make these ghost cookies, you’ll need some basic kitchen tools. Having the right tools makes the process smoother and more enjoyable.
Essential Tools and Equipment
- Mixing bowl
- Measuring scales
- Baking sheet
- Parchment paper
- Spatula
Importance of Each Tool
- Mixing bowl: A good mixing bowl is essential for blending your icing sugar and creating the perfect ghostly frosting.
- Baking sheet: Helps in arranging your cookies neatly while they set after decoration.
- Spatula: Ideal for spreading icing onto the cookies evenly for that perfect ghostly look.
Ingredients
To create these spooky ghost cookies, gather the following ingredients:
For the Icing
- 175g icing sugar
For the Cookies
- 1 x 200g pack chocolate chunk cookies
For the Ghosts
- 9 vegan marshmallows (regular size)
- black writing icing
How to Make Ghost cookies
Step 1: Prepare Your Workspace
Start by clearing a clean surface where you can assemble your ghost cookies. Lay down parchment paper on your baking sheet for easy cleanup.
Step 2: Mix the Icing Sugar
In a mixing bowl, sift the 175g icing sugar. Add a small amount of water gradually until you reach a smooth yet thick consistency suitable for spreading.
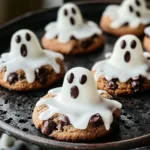
Step 3: Decorate the Cookies
- Take each chocolate chunk cookie and spread a layer of icing over the top using a spatula.
- Place one vegan marshmallow on top of each iced cookie to form the ghost’s body.
Step 4: Add Ghost Faces
Using black writing icing, draw eyes and mouths on each marshmallow to create spooky faces.
Step 5: Let Set
Allow your decorated ghost cookies to sit for about 10 minutes so that the icing can set before serving.
Now you’re ready to impress your friends with these delightful ghost cookies! Enjoy making them as much as you enjoy eating them!
How to Serve Ghost cookies
Ghost cookies make for a fun and festive treat perfect for Halloween gatherings, parties, or just a spooky afternoon snack. Here are some creative serving suggestions to delight your guests.
Individual Treat Bags
- Create personalized treat bags filled with ghost cookies. Use clear bags tied with colorful ribbons for a charming presentation.
Halloween-Themed Dessert Platter
- Arrange ghost cookies on a themed platter alongside other spooky treats like pumpkin-shaped candies and chocolate spiders for a visually appealing display.
Spooky Cookie Tower
- Stack ghost cookies in a tower formation and garnish with edible glitter or spooky decorations for an eye-catching centerpiece at your Halloween party.
Cookie Decorating Station
- Set up a decorating station where guests can add their own designs using black writing icing. This interactive element adds fun and creativity to the experience.
How to Perfect Ghost cookies
To ensure your ghost cookies turn out as delicious as they are adorable, consider these helpful tips.
- Use fresh ingredients: Fresh icing sugar and marshmallows enhance the flavor and texture of your ghost cookies.
- Chill before decorating: Allow the cookies to cool completely before adding icing; this prevents melting and ensures clean designs.
- Practice piping techniques: Familiarize yourself with piping black icing on the marshmallows to create cute ghost faces. Practice on parchment paper first!
- Store properly: Keep your ghost cookies in an airtight container at room temperature to maintain their freshness and texture.
Best Side Dishes for Ghost cookies
Pairing side dishes with ghost cookies can elevate your Halloween festivities. Here are some delightful options to consider:
- Pumpkin Soup: A warm, creamy pumpkin soup adds a comforting touch alongside the sweet treats.
- Spicy Nachos: Crunchy nachos topped with cheese and jalapeños provide a savory contrast to the sweet ghost cookies.
- Fruit Salad: A refreshing fruit salad offers a healthy balance, featuring seasonal fruits like apples and oranges.
- Vegetable Platter: Crisp vegetables served with hummus or ranch dip create a nice crunch that complements the sweetness of the cookies.
- Chocolate Mousse: Rich chocolate mousse serves as an indulgent dessert option that pairs well with the playful theme.
- Caramel Apples: These classic treats bring together flavors that resonate well with autumn, making them a perfect companion for ghost cookies.
- Popcorn Bar: Offer various popcorn flavors—sweet, savory, or spicy—for guests to enjoy alongside their spooky cookie creations.
- Cheese Board: A cheese board featuring assorted cheeses, crackers, and fruits balances out the sweet treats perfectly while offering variety.
Common Mistakes to Avoid
When making ghost cookies, it’s easy to make a few common errors. Here are some mistakes to watch for.
- Using the wrong icing sugar: Not all icing sugars are created equal. Ensure you use a fine icing sugar to get smooth coverage on your cookies.
- Not letting cookies cool: Frosting warm cookies can lead to a melted mess. Always let your cookies cool completely before decorating.
- Skipping the black writing icing: This icing adds character and detail. Be sure to include it for the ghostly features!
- Ignoring measurements: Precision matters in baking. Measure your ingredients accurately to ensure the best results.
- Rushing decoration: Take your time when decorating. A hasty approach can ruin the spooky look of your ghost cookies.
Storage & Reheating Instructions
Refrigerator Storage
- Store ghost cookies in an airtight container.
- They can last up to 5 days in the refrigerator.
Freezing Ghost cookies
- Place ghost cookies in a single layer in a freezer-safe container.
- You can freeze them for up to 2 months; just make sure they are well-wrapped.
Reheating Ghost cookies
- Oven: Preheat the oven to 350°F (175°C). Warm cookies for about 5-7 minutes until heated through.
- Microwave: Heat one cookie at a time for about 10-15 seconds on medium power.
- Stovetop: Place cookies in a skillet over low heat for about 1-2 minutes until warmed.
Frequently Asked Questions
Here are some frequently asked questions regarding ghost cookies.
What are ghost cookies?
Ghost cookies are fun, spooky treats made by decorating chocolate chunk cookies with icing and marshmallows to resemble ghosts.
How can I customize my ghost cookies?
You can customize ghost cookies by using different colors of icing, adding sprinkles, or using various cookie shapes other than round ones.
Can I use other types of cookies for this recipe?
Yes! While chocolate chunk is recommended, you can use any cookie you prefer as a base for your ghost decorations.
How long does it take to make ghost cookies?
Preparing and decorating these ghost cookies takes about 25 minutes from start to finish.
Final Thoughts
Ghost cookies are an exciting treat that combines creativity with deliciousness, perfect for Halloween gatherings or any festive occasion. Feel free to adjust the decorations and colors to fit your theme, making these sweet delights uniquely yours!
Ghost Cookies
Get ready to enchant your Halloween celebrations with these delightful Ghost cookies! These spooky treats are not only visually captivating but also incredibly easy to whip up. With a base of chocolate chunk cookies topped with fluffy vegan marshmallows and adorned with playful icing, they’re guaranteed to be a hit at any gathering. Perfect for kids and adults alike, these no-bake cookies allow for creative customization while keeping the fun factor high. Whether you’re hosting a Halloween party or looking for an engaging activity to do with the family, these Ghost cookies will bring smiles and laughter to your festivities!
- Prep Time: 15 minutes
- Cook Time: 0 minutes
- Total Time: 15 minutes
- Yield: Makes approximately 9 servings 1x
- Category: Dessert
- Method: No-Bake
- Cuisine: Halloween Treats
Ingredients
- 175g icing sugar
- 200g chocolate chunk cookies
- 9 vegan marshmallows
- Black writing icing
Instructions
- Prepare your workspace by laying down parchment paper on your baking sheet.
- In a mixing bowl, sift the icing sugar and gradually add water until it reaches a smooth, thick consistency.
- Spread icing over each chocolate chunk cookie using a spatula.
- Place one vegan marshmallow on top of each iced cookie to create the ghost's body.
- Use black writing icing to draw eyes and mouths on each marshmallow, forming spooky faces.
- Allow the decorated cookies to set for about 10 minutes before serving.
Nutrition
- Serving Size: 1 cookie (25g)
- Calories: 110
- Sugar: 11g
- Sodium: 20mg
- Fat: 3g
- Saturated Fat: 1g
- Unsaturated Fat: 2g
- Trans Fat: 0g
- Carbohydrates: 20g
- Fiber: 0g
- Protein: 1g
- Cholesterol: 0mg