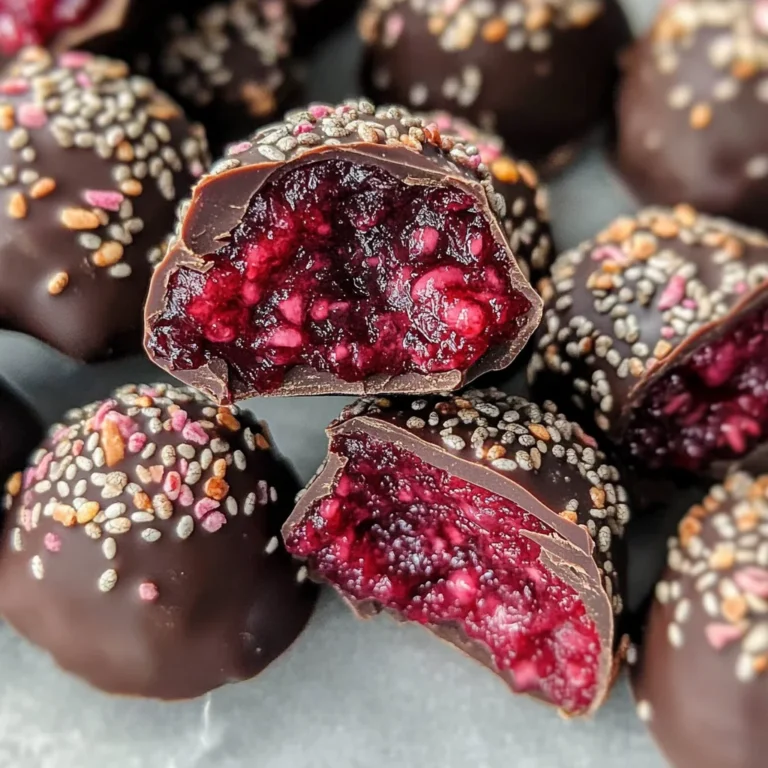
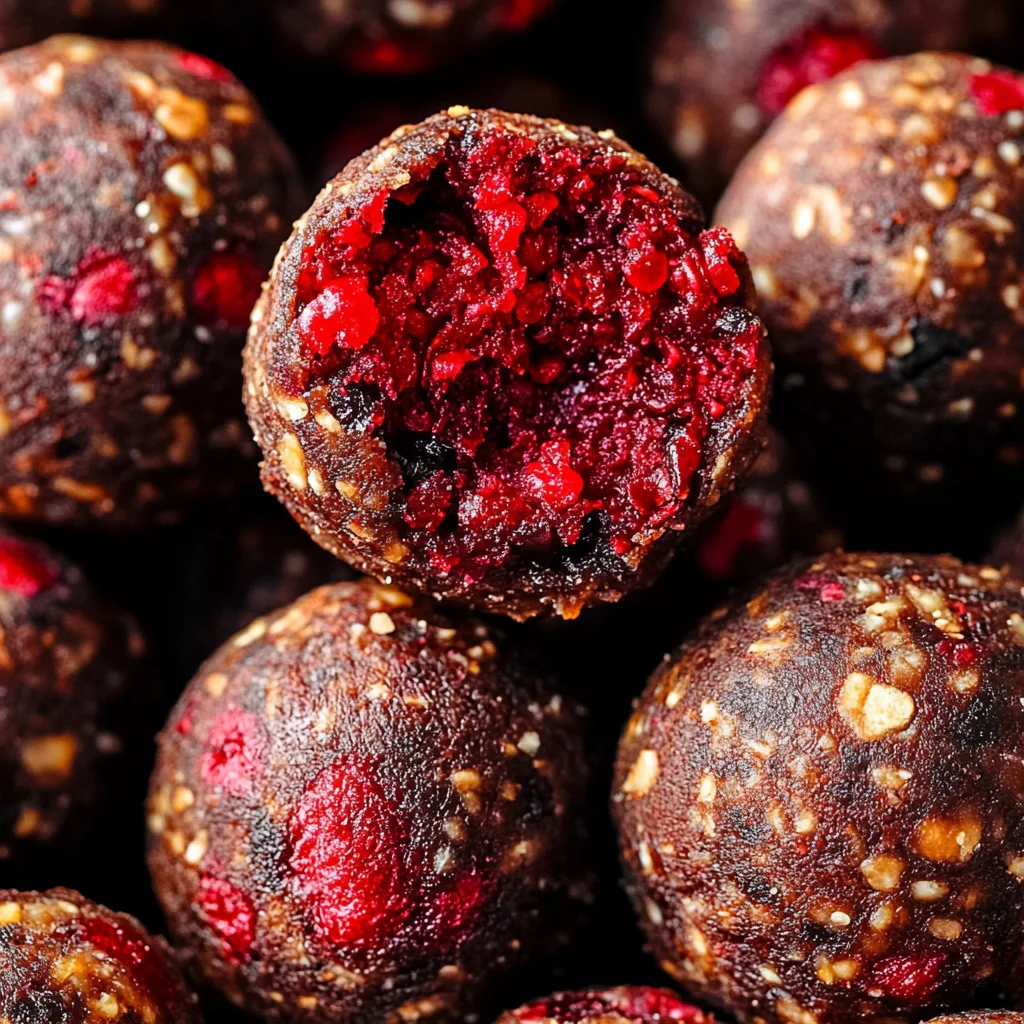
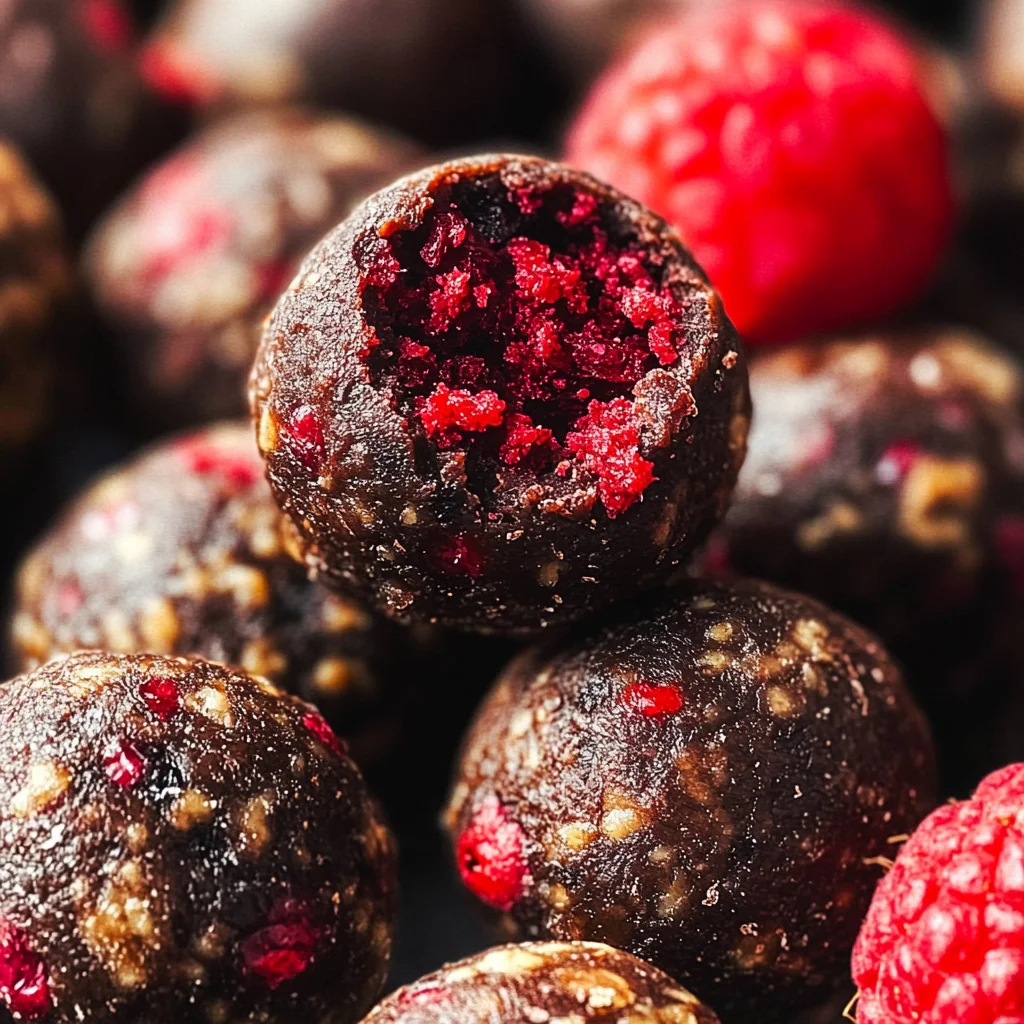
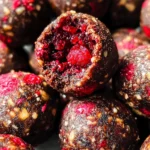
Berry Chocolate Bliss Balls
These Berry Chocolate Bliss Balls are a delicious, healthy snack perfect for any occasion. Whether you need a quick energy boost during the day or a guilt-free treat after dinner, these bliss balls deliver. Packed with nutrients and bursting with flavor, they’re easy to make and even easier to enjoy. Plus, they’re a fantastic way to incorporate berries into your diet!
Why You’ll Love This Recipe
- Quick and Easy: You can whip these up in just 15 minutes, making them ideal for busy days.
- Nutritious Ingredients: Made with cashew butter, oat flour, and cocoa powder, these bliss balls are packed with healthy fats and protein.
- Versatile Snack: Enjoy them as a dessert, a pre-workout snack, or a midday pick-me-up.
- Customizable Flavors: Add your favorite nuts or seeds to change up the taste each time.
- No Baking Required: Simply mix and roll—no oven needed!
Tools and Preparation
To create these delicious Berry Chocolate Bliss Balls, you’ll need some essential tools that make preparation simple and efficient.
Essential Tools and Equipment
- Mixing bowl
- Measuring cups
- Spoon or spatula
- Airtight container
Importance of Each Tool
- Mixing bowl: A good mixing bowl allows you to easily combine all ingredients without spilling.
- Measuring cups: Ensures accurate measurements for perfect texture and flavor every time.
- Spoon or spatula: Essential for mixing ingredients thoroughly and forming the bliss balls.
- Airtight container: Keeps your bliss balls fresh longer when stored in the fridge.
Ingredients
For the Base
- 140g cashew butter
- 2 1/2 tbsp maple syrup
- 1-2 tbsp coconut oil
- 55g oat flour
- 3 tbsp cocoa powder
- Pinch of salt
Optional Ingredients
- 2 scoops Bloom berry greens powder
- Freeze dried raspberries (for coating)
How to Make Berry Chocolate Bliss Balls
Step 1: Mix the Wet Ingredients
In a bowl, mix the cashew butter, maple syrup, and 1 tbsp of coconut oil. Stir until well combined.
Step 2: Combine Dry Ingredients
Add the oat flour, cocoa powder, optional greens powder, and a pinch of salt. Mix until everything is well incorporated.
Step 3: Adjust Consistency
If the mixture appears dry, add another tablespoon of coconut oil. Mix again until smooth.
Step 4: Form Into Balls
Using your hands, form small balls from the mixture. If desired, roll them in crushed freeze dried raspberries for added flavor and texture.
Step 5: Store Properly
Place the bliss balls in an airtight container and store them in the fridge for up to five days. Enjoy whenever you need a nutritious snack!
These Berry Chocolate Bliss Balls not only taste amazing but also provide energy throughout your day. They are an excellent addition to any healthy eating plan!
How to Serve Berry Chocolate Bliss Balls
Berry chocolate bliss balls are a versatile treat that can be enjoyed in various ways. Whether you need a quick snack or a delightful dessert, these bliss balls fit the bill perfectly.
As a Snack on the Go
- Easy to pack: These bliss balls are portable and perfect for busy days.
- Nutrient-dense: They provide a quick boost of energy with healthy fats and protein.
With Fresh Berries
- Colorful presentation: Pairing with fresh berries enhances the flavor and adds a vibrant touch.
- Extra antioxidants: Berries complement the bliss balls’ health benefits while adding freshness.
Crumbled Over Yogurt
- Delicious topping: Crumble bliss balls over dairy-free yogurt for added texture and flavor.
- Balanced meal: This combination is perfect for breakfast or a light dessert.
At Parties
- Crowd-pleaser: Serve them at gatherings as bite-sized treats everyone will love.
- Easily customizable: Offer different coatings like crushed nuts or seeds for variety.
With Tea or Coffee
- Perfect pairing: Enjoy these bliss balls alongside your favorite hot beverage for a satisfying snack.
- Afternoon treat: A great way to indulge during an afternoon break.
How to Perfect Berry Chocolate Bliss Balls
Creating the ultimate berry chocolate bliss balls is easy with a few simple tips. Follow these guidelines to ensure they turn out delicious every time.
- Use room temperature ingredients: This helps in mixing everything together smoothly.
- Adjust sweetness: If you prefer sweeter bliss balls, add more maple syrup or adjust according to your taste.
- Experiment with flavors: Try adding different nut butters or spices like cinnamon for variety.
- Chill before serving: Refrigerating the balls for at least 30 minutes helps them firm up and enhances flavors.
- Store properly: Keep them in an air-tight container in the fridge to maintain freshness.
Best Side Dishes for Berry Chocolate Bliss Balls
Pairing side dishes with berry chocolate bliss balls can elevate your snacking experience. Here are some ideas that complement their rich flavors.
- Fruit Salad – A mix of seasonal fruits adds freshness and balances the sweetness of the bliss balls.
- Nut Mix – A handful of mixed nuts provides crunch and additional protein, perfect for energy boosts.
- Smoothie Bowl – Create a smoothie bowl topped with granola and berries for a wholesome meal option.
- Chia Pudding – Serve chia pudding as a creamy side that contrasts nicely with the texture of the bliss balls.
- Coconut Yogurt – A dollop of coconut yogurt adds creaminess and pairs well with chocolate flavors.
- Granola Bars – Homemade granola bars can be served alongside as an extra chewy snack option.
Common Mistakes to Avoid
Making Berry Chocolate Bliss Balls is simple, but there are a few common mistakes that can affect your results. Here are some tips to help you succeed.
- Using Too Much Liquid: Adding too much maple syrup or coconut oil can make the mixture too wet. Start with the recommended amounts and adjust as needed.
- Not Measuring Ingredients Accurately: Inaccurate measurements can lead to an unbalanced flavor or texture. Use a kitchen scale for precise measurements, especially for ingredients like oat flour and cocoa powder.
- Skipping the Salt: A pinch of salt enhances the flavors in your bliss balls. Don’t skip this step; it makes a noticeable difference in taste.
- Neglecting to Chill the Mixture: If your mixture feels too soft, chill it for 15 minutes before rolling into balls. This helps them hold their shape better.
- Overmixing: Mixing too long can make the mixture tough. Combine just until everything is incorporated for the best texture.
Storage & Reheating Instructions
Refrigerator Storage
- Store in an airtight container.
- They will keep fresh for up to 5 days in the fridge.
Freezing Berry Chocolate Bliss Balls
- Place them in a single layer on a baking sheet to freeze first.
- Once frozen, transfer them to a freezer-safe bag or container. They can last up to 3 months.
Reheating Berry Chocolate Bliss Balls
- Oven: Preheat to 350°F (175°C) and warm for about 5-10 minutes.
- Microwave: Heat for about 10-15 seconds on medium power. Be careful not to overheat.
- Stovetop: Place in a pan over low heat for a couple of minutes, turning frequently.
Frequently Asked Questions
What Are Berry Chocolate Bliss Balls?
Berry Chocolate Bliss Balls are delicious snacks made from cashew butter, cocoa powder, and optional freeze-dried raspberries, perfect for energy boosts.
Can I Use Other Nut Butters?
Yes! You can substitute cashew butter with almond butter or peanut butter based on your preference.
How Can I Customize My Berry Chocolate Bliss Balls?
Feel free to add nuts, seeds, or different types of dried fruits for added texture and flavor variety.
Are These Bliss Balls Vegan?
Absolutely! These Berry Chocolate Bliss Balls are vegan-friendly and made without any animal-derived ingredients.
How Many Calories Are in Each Bliss Ball?
Each Berry Chocolate Bliss Ball contains approximately 111 calories, making them a guilt-free treat!
Final Thoughts
These Berry Chocolate Bliss Balls are not only easy to make but also versatile and customizable. You can enjoy them as a quick snack or serve them as a healthier dessert option. Get creative with your favorite mix-ins and impress your friends and family with this delightful recipe!
Berry Chocolate Bliss Balls
Indulge in the delightful taste of Berry Chocolate Bliss Balls, a nutritious snack that perfectly balances flavor and health. These no-bake treats are quick to prepare, taking only 15 minutes from start to finish. Packed with wholesome ingredients like creamy cashew butter and rich cocoa powder, they provide a satisfying boost of energy without any guilt. With the added crunch of optional freeze-dried raspberries, each bite is bursting with berry goodness. Whether you’re looking for a pre-workout snack, a post-dinner treat, or something to fuel your busy day, these bliss balls are wonderfully versatile and easily customizable. Enjoy them as they are or pair them with fresh fruit for an added twist!
- Prep Time: 15 minutes
- Cook Time: 0 minutes
- Total Time: 15 minutes
- Yield: Approximately 12 bliss balls 1x
- Category: Dessert
- Method: No-Bake
- Cuisine: Vegan
Ingredients
- 140g cashew butter
- 2 1/2 tbsp maple syrup
- 1–2 tbsp coconut oil
- 55g oat flour
- 3 tbsp cocoa powder
- Pinch of salt
- 2 scoops Bloom berry greens powder (optional)
- Freeze dried raspberries (for coating)
Instructions
- In a mixing bowl, combine cashew butter, maple syrup, and 1 tablespoon of coconut oil until smooth.
- Add oat flour, cocoa powder, and salt; mix well until fully combined.
- If the mixture is dry, incorporate another tablespoon of coconut oil.
- Shape the mixture into small balls and roll them in crushed freeze-dried raspberries if desired.
- Store in an airtight container in the refrigerator for up to five days.
Nutrition
- Serving Size: 1 bliss ball (30g)
- Calories: 111
- Sugar: 5g
- Sodium: 23mg
- Fat: 7g
- Saturated Fat: 2g
- Unsaturated Fat: 5g
- Trans Fat: 0g
- Carbohydrates: 9g
- Fiber: 2g
- Protein: 3g
- Cholesterol: 0mg